Friday, September 30, 2011

Office Makeover Breakdown: Standing File Holder

OK-- so here's my second favorite project from my office makeover-- the standing file.  (second only to the pennant banner project which makes me so happy!)

I knew I wanted a standing file organizer for my desk space (to help corral some of that "I need it at my fingertips every day" type clutter that an office desk has, but I also knew I wanted it to be pretty and not cost me an arm and a leg.  Enter Martha Stewart Tutorial.


So if you haven't already checked out that tutorial-- you'll never guess what this organizer is made from.

A cereal box!  That Martha-- she's a genius I tell ya'.

So go raid the pantry and make one of these!  Now!

Gather your supplies:
note:  I ended up using different paper but didn't take a new "supplies" photo
Figure out where you want to make your cut and mark with a straight edge.
yes, this cheapskate buys "store brand" cheerios.  Not all "store brand" cheerios are good, but these from Aldi (if you have one near you) are actually pretty close to the real thing!

You could probably Mod Podge or decoupage or contact paper your box, but I just used plain ole' scrapbook paper and my trusty glue stick.  I laid the box out on my papers and marked.  Then when I cut them out I left a LITTLE overhang so that they could wrap around the edges to ensure no "gaps".  A piece for each side, front, back and bottom completed the outside.  FYI:  with my cereal box the 12"X12" paper worked REALLY well!


Then, using a complementary paper, I started on the inside.  Since I was using a patterned paper, I was able to work with any creases easily when using more than one piece to fit a side (with the 8 1/2" X 11" paper that I used for the inside).
Because I knew no one would see the inside bottom of my file, I chose to leave that part alone, but it would have been easy enough to do the whole thing.
Here's the beauty of this project (and the specific papers I chose).  If you have little bits that don't get totally covered, you can easily disguise them with a little marker action.  

Now you see it:
see the bit of yellow peaking out.  Oh and look at that-- some of my camera strap made it into the photo too-- oops!
Now you don't:
Hooray for quick fixes!

And now a few glamour shots:

I LOVE this cool retro bin I found in our office supply closet at work too.

Total cost for this project:  FREE-- I already had the cereal box, papers, marker and glue all on hand!

Now I just can't wait to get a house so I can make some for a home office too! :)

Thursday, September 29, 2011

Office Makeover Breakdown: Scraps Art

If you remember, after this post,  I mentioned to hold on to any scraps that you created because we would do something fun with them!  Well.... today's the day to do something fun with those scraps.  

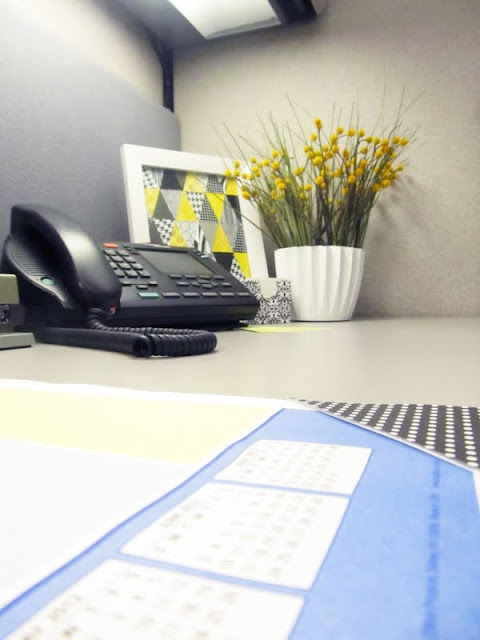
I used the ancillary triangles that are created by the "fold and cut" method presented in the pennant banner tutorial to create some coordinating art for my desk space as well.
I found the frame at the Dollar Tree and knew I could create some "cheap" art for my desk.  I had planned to create a mosaic type art using paint chips, but when those little triangle pieces started falling in my lap, I changed my tune.

It is SUPER easy to do-- especially since you've already have your coordinating papers picked out.

I started by roughly laying out all the triangles in the color/pattern combinations that I liked.

Once I had that done, I realized that they didn't fit my 8X10 frame exactly so I re-worked them a bit.  I started by taping row by row together so that the edges remained even and so I didn't loose track of the pattern combinations I had already come up with.


Once I had all the rows laid out I put them over a sheet of cardstock (for a little stability) cut to my 8"X10" dimensions.  I actually used a patterned cardstock (since that's what I had on hand).
I arranged the rows until the top and bottom rows were evenly of the page and marked where they needed to be cut.  
I took my handy paper cutter and made a straight cut across the top/bottom of those rows.

Then it was just a matter of gluing all my rows onto my cardstock template.  
The edges needed some scraps also, but once all the rows were in place it was easy to see just what shapes/sizes I needed.  I took remaining triangle pieces and cut them to fit.  Replace the glass and secure your new artwork in the frame --Easy peasy!
And I love it-- makes my desk feel a little more "homey" than "officey"


I should mention that using the patterned cardstock proved to be a great choice because it hides some of the imperfections in the way some of the triangles line up (since my patterns are pretty "busy").

Total cost for this project:  $1.00 for the frame.  Paper scraps, tape and glue stick I had on hand.
The best part-- I didn't have to throw away all those cute triangles!  (and yes-- I realize how nerdy that sounds.)

Thursday, September 22, 2011

Another big reveal!

Please allow me to interrupt our regularly scheduled cheapskate blog to give a quick personal update.  Because many of my readers are people who know me personally, I have to devote a post to a recent (like 2 hours ago) personal update that I did.   But if you get all the way to the end, I do have a cheapskate tip for you!

I FINALLY after 4+  years got a haircut.  A haircut?  This is the big reveal?  Yes.  A haircut.  And yes, this is the big reveal.  You see... when I started calculating in my head I realized that I have had long-- ridiculously long hair for probably ... gulp... 18 years.    In my defense, I haven't really seen my hair much in probably the last 6 or 7 years so I had totally lost track of it.

Everyday without fail my hair has gone directly from shower to tight bun and then down only for the next shower.  It was crazy, but it was easy-- no fuss.  Plus, I couldn't STAND having it down and I kinda liked my look when it was up.   After all these years though it was MORE than time for a change.

So today I went from looking like a hippie, old hag, horse lady with my hair down, to looking somewhat normal.  And I love it!

This is what I looked like EVERY. SINGLE. DAY for the last 7 years:
photo curtesy of an art museum kiddie section where you could change the background to different art prints and take your own photo... long story
Here's what I looked like this weekend when I took my hair down just long enough for it to dry naturally and allow me to take photos.  It went right back up into my "signature bun" (as one of my previous employers dubbed it) immediately after the last photo was taken.    Oh and ps-- I had NO good light or way to take these photos, so please don't critique my photo skills here. :)


yes, I had to squat to get it all in the photo
And here is how I looked this a.m. before leaving for work. I got up an extra hour early this a.m. to straighten it.  (kinda hard to gauge it's length here but if you look closely you can see its kinda pooled up in my lap- gross I know)
yes-- Cole dressed himself this a.m. :)

And.......................................


wait for it............................


Post haircut:  It's not terribly dramatic, but I love it.  I feel like I've lost 20 lbs.  (and I may have) :)

Do you hear the music?  I do.
 
And with a little wind blowing through the hair...


Oh and as promised, my cheapskate haircut tip.  Take say... 4 years or so, grow your hair as long as you can, then go into the salon and cut off about 2 feet (which is what I did today) and donate it to a charity like Locks of Love.  Your haircut will be FREE (at least mine was)!  :)  The best surprise of all today on my birthday!


So.... what do you think?  (be nice please!)

Wednesday, September 21, 2011

Office Makeover Breakdown: Pennant Banner

By FAR my favorite part of my "new" office space is the fun pennant banner that hangs on the doors to my top cabinets.  I LOVE them-- they make me so happy.


In fact-- it was my very first thought when the idea of re-doing this space came to mind.  There is something about a pennant banner that makes every day feel like a party.

I had most of the supplies on hand so really this whole project cost me $1 (bought the 12 x 12 scrapbook papers when they were on sale for 5/$1) and about an hours worth of time.

I didn't do a full tutorial (because it's SO easy to do), but here's the gist:  

1. figure out about how long and wide you want each flag to be.  My mini bunting is 2 1/4" long (h) and 1 1/2" wide.

2. Cut a strip of paper TWICE as wide as your final flag height will be.  Fold your paper in half at the desired height (so you have a really long rectangle) and mark your widths along the crease.  Also measure the center point between your 2 width marks (in my case that was 3/4") on mark it on the non-crease end.   (or just mark off one, cut the one out and then use it as a template for all the others)

3.  Then cut from one width mark to your center mark and then the other.    When unfolded you should have what looks like a diamond shape.

4.  Fold the triangle over a thin string or ribbon (cut to the length that you want plus a little extra so that you have hanging room) and glue the two inside sides of the triangles together with your trusty glue stick.


And there you have it.  Instant fun!
Oh and I made some more "pretty string" too just because it made it so much cuter.


Now go make a ton of these-- they're so fun!   

Oh and keep your scraps-- I'll show you another quick/easy project you can do with your leftovers!