Saturday, April 30, 2011

Use What Ya' Got-- Anniversary edition.

And this is what I got.  Don't you LOVE it?!


OK wait- before you throw me in the looney bin-- keep reading. :)

So... yesterday was the Royal wedding (and yes-- I got up at 4am EST to watch).  But 6 years ago today there was another wedding that was even more important to me.  Mine.

We don't really do gifts for our Anniversary, we usually just go out dinner of something.  Then out of no-where I got this great idea to MAKE an Anniversary present for us (not just for my husband-- for me too!)  I'd seen the idea floating around the blogosphere, but I don't have a Silhouette machine (like EVERYONE else in blogland seems to have), so I thought I couldn't do it.  This morning I decided I really WANTED to do it so.... Here it is!

I LOVE IT!  and so does my husband-- score!

OK since I don't have a Silhouette and I'm a cheapskate and I've made a new pact with myself to 'Use What I Got', here's how I did it:

First I gathered all my materials in a nice neat pile.  :)
2 coordinating scrapbooking papers
my words printed on my laser printer
scissors with a VERY fine point
tape
gluestick
frame (purchased at Goodwill for $1.75)
black spray paint

First I started by painting the frame.


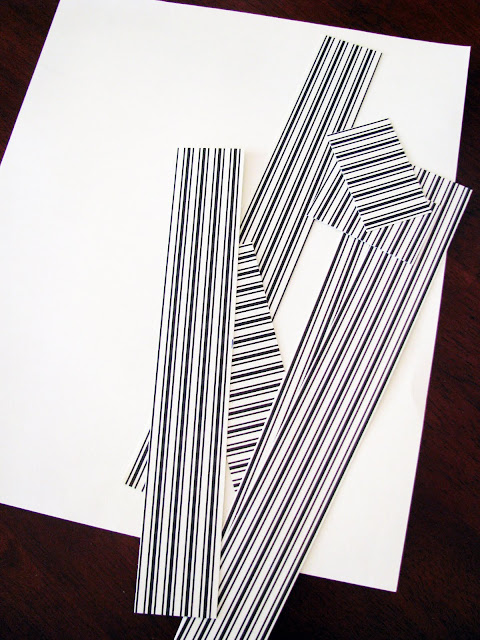
While the frame was drying I started piecing together the papers.  Because I was 'Using What I Got', I chose some 8 1/2 X 11 paper and a scrap of a bigger pice for the background so it took a little work.  I purposely chose a pattern that would be easy to match up because I wanted a seamless look-- stripes worked really well.

I was using a perviously framed print (that was permanently attached to the back board), so I had to add another layer to help cover it up .  I just used plain computer paper-- nothing fancy-- it's not going to be seen anyway.

 And then trim away any excess.
Then I put together all the pieces to make the matted look.
 For the pieces that weren't long enough, I taped same sized pieces together on the back side being careful to line up the stripes precisely.
 In some places the pieces didn't have to be EXACTLY the same width.  (note the 3 separate pieces below).
 And in other places it is important for the pieces to be the same width.  The band of stripes at the bottom on the next photo is actually 2 pieces.  Can you spot the place where they are lined up?
Then I started to cut out my letters.  This was by far the most time consuming part, but in the end, the whole project only took a couple of hours (and I ran outside to play with the boys for a bit too).
 This is why you need the fine tipped scissors.


To make sure my letters were lined up and straight I used a ruler.
My husband was very quick to note that I put the 'O' in Metallo on vertically instead of horizontally.  Oops.  Doesn't really bother me though.
Again, I'm sure I could have found letter stickers that would have worked too, but... #1. it would cost money, #2. I was doing this project on a total whim and didn't want to have to run out and search stores to find the "right" letters, #3. I am 'Using What I Got' (computer paper, printer ink, scissors and a glue stick).

Then frame up the finished product and there you have it!
FYI-- in most light you can't see the place where the background paper lines up-- this is just a bad photo of it.


And one final before and a few afters.

Before:
And After:
 Total cost:  $1.75 (because I had everything else on hand already)


Happy Anniversary to the BEST husband a girl could ask for.  I love you!

Wednesday, April 27, 2011

An Easter Pictorial

Whoa!  Life got away from me for a bit.  Things got pretty hectic here for a while, but I am willing them to calm down now so I should post a bit more regularly now.

But in the interest of time, here's a pictorial post of our Easter dinner (and it's a LOT of photos).  OF COURSE I totally forgot to take a picture of the most important part of dinner-- our company -- the 3 older kids + 1 boyfriend.  I promise you it was a table full of gorgeous people but alas... I got too caught up in ...well... eating, to take a photo.  (yes-- I gave myself the day off of my diet for Easter-- and it was GOOD!)

Anyway, without further adieu...  Easter; cheapskate style.


(note:  The Buzz Lightyear toy in his hand is a gift that his Grandpa brought back from Disney for him-- he hasn't put it down in DAYS!-- well except in the next picture)
 Two minutes later--
I tend to buy and stash little items all year round when I find a good deal-- perfect for Easter baskets or Christmas stockings or 'Job Well Done' treats.  For example-- the stuffed monkey was an After Valentine's Day Clearance item that I got for $2.  I just switched out the red/hearts ribbon for something a bit more Easter-y.

Grace came Saturday and stayed overnight with us so she got to take part in the fun too!  The other kids had to wait until the evening to get their baskets.

A small Easter egg hunt in our tiny apartment.
Can you spot the Golden Egg?

And for Daddy from the Easter Bunny...

 Easter Dinner Table:

The first plan was to use the carrot cones for popcorn for movie watching but then I decided the table needed a bit more color.

Then I was going to write names on the "carrot cones" and use them as place cards, but in the end decided against it to keep it clean looking and added a little flower for filler.
 

Love the Spring-y pops of color on the table!


Pier 1 ceramic bird salt shakers-- $1.50 each.  So sweet! They work on an Easter table and for Christmas too.  They could even be "love birds" for a Valentine's Day setting. Love multi-purpose items!
And what would a holiday in our household be without a little LEGO.
And for dessert:
 We're not big on "fussy" desserts (I know- shocking right?!) so cute egg nest cupcakes seemed like the perfect thing.


Classic little boy.

And of course while waiting for the other kids to arrive, Cole watched Toy Story 3 (for the 9 millionth time) with his good buddy, Woody.

Here's how I found him during the "scary" part.
All in all a really nice, relaxing holiday.  Although I'm still kicking myself for not taking photos when all of the kids were here.  arrgh!

Anyway... the cheapskate portion:

After dinner I disassembled the carrot cones because surely I can find another way to use these paper scraps in someother project even though parts are a little beat up.  Yep.  I did.
What would you do with these?