I've said it before and I'll say it again. I LOVE to plan parties! I've coordinated lots of corporate events,
parties for my son-- I even helped offer ideas/vendors for a friend's son's "Rockstar" 1st birthday party, but I've never had a chance to do a real girly party-- until now!
When my friend Kim started talking about her daughter's upcoming 4th birthday party, I subtly invited myself to help and she totally bit! :) Of course I was challenged to keep the budget to a minimum so we DIYed much of the decor and food, BUT we didn't want to sacrifice the details either! Using what we already had, working with coupons and shopping post-holiday sales helped us keep the costs down.
Sarah (the birthday girl) very specifically asked for a "purple fairy pixie dust" party. Sarah would've been happy with a store-bought tinkerbell party, but Kim (Sarah's mom) didn't want a full-on licensed character party.
When I joined in the party conversation a few things were already set-- the venue and the entertainment. Basically we had to come up with decor, food and favors.
Kim got a great sized space to use for the party for FREE! It presented some challenges but the price was right. It was ALL dark wood paneling, there was LOTS of furniture in the room (with no other space in the building to move it to), and we were given lots of restrictions- like not taping anything to the walls.
On the other hand, the space was the perfect size, it had an attached kitchenette (for final food preparations/storage), and it was FREE! :) All the tables and chairs were also thrown in for free. So far our budget was off to a great start!
One week before the party I got my first look at the space. Luckily a lot of the ideas we already had planned were going to work. Here's the space as I saw it 1 week before party time:
 |
| from the entrance to the room |
 |
| looking to the left |
 |
| non-working fireplace-- looking back toward the entry way hallway |
 |
| looking right |
That's a lot of dark wood and a lot of orange and blue furniture-- doesn't quite scream "purple fairy pixie dust" now does it??!
After and hour and a half of set up, here's how the room looked at party time:
A simple sparkly bow welcomed guests (bought during post-holiday-sale).
 |
| It snowed the morning of the party. The sled not only helped move food/supplies into the space, but pulled double-duty as a great activity on the adjacent hill to keep the little ones busy during post-party clean up! |
Each place setting had a large paper doily, lime green plate, Tinkerbell fairy napkins and cups (Sarah's choice) and an extra napkin sticking out of the cup to add a little height to the table setting.
The tables were scattered with sparkly fairy confetti and white flower petals found on clearance in the wedding section.
I also found mercury glass votive candle holders in purple with rhinestones and silver with butterfly appliques for $.30 each in the holiday clearance bins at
Michael's craft store. We used
battery operated tea light candles (3 for $1.00 at
DollarTree) to add some warmth without adding any risk. Even though it was a daytime party, it felt really special to have the flicker of "candle"light.
 |
| apparently the fairy with the black hair really liked them :) |
Centerpieces included tissue paper flowers and star shaped lollipops for the kids to take at the end of the party in simple mason jars. Totally simple and totally kid friendly!
Each child's chair had fairy wings (found in the Target dollar spot) for the kids to wear and then take home-- serving as both decor AND favors. Gotta love double duty items!
Even though this was a children's party, we still wanted things to LOOK nice, so we dressed up the food table with glass serving pieces, fun ribbon (also seen
here) and lots of sparkle.
One of my favorite projects that we did were the tutu cake stands. I'll be back with a quick tutorial on how we did these. Really easy and SUPER cute!
 |
| We took store bought subs, cut them into bite sized "fairy bites" and cut peanut butter and jelly sandwiches into star shapes. |
To dress up some
Pirate's Booty, we portioned out single servings into cute
cupcake liners (bought at Michael's with 40% off coupon) and served them on a silver tray.
Of course every good kids party has to have theme appropriate named food/drink. We served:
"Fairy Bites" sandwiches
"Twirly Wands" pasta salad
"Magic Munchies" carrots and celery (with hummus and ranch dip)
"Tinker-berries" grapes
"Pixie Punch" pink lemonade
"Tinkerbell Tea" iced tea
"Dew Drops" water
And for dessert we brought out cake (which I totally forgot to take a photo of), wafer cookie bites and of course even the Hershey kisses got gussied up for the party!
 |
| Inspiration from here. We didn't do the gumball topper (which is much cuter) because of the choking hazard. |
Above the food table hung paper stars (like the ones I used
here) and these sparkly damask ornaments that I also found in the Michael's post-holiday clearance section for $.30 ea. It was hard to get a photo of (because of the windows), but you'll have to take my word for it that it was REALLY pretty!
Behind the food table, the medallion that I previewed
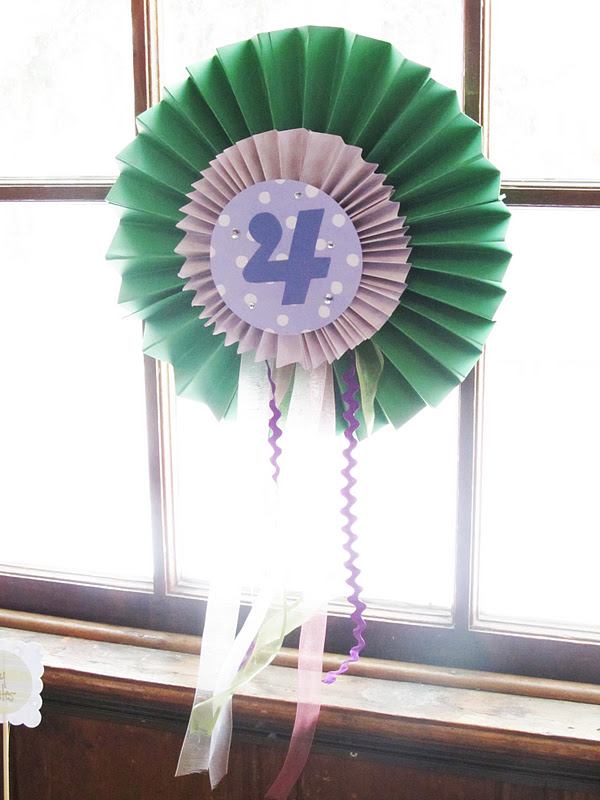
here hung via suction cup hook from a window-- also REALLY hard to get a good photo of.
The fireplace area was dressed with lots of tissue paper pom poms. Originally we were going to hang them over the fireplace, but when I saw that giant black rectangle where a mantle must've been, I knew we had to cover it with SOMETHING. I wish I'd done 3 or 4 more, but over all it was not a bad guesstimate either.
The handmade Happy Birthday banner also hung above the fireplace.
We tucked these glittery fairy ornaments (bought on post-holiday-clearance at Walmart for $1.48/12) all over the party.

And used small frames that I bought during a post-Halloween-sale ($.50 ea.) last year to hold cute fairy quotes and inspirational words.
Balloons with Hershey kiss balloon weights were also strewn throughout.
Kim brought a lavender area rug from her daughter's bedroom and we moved a couch out into the space on a diagonal to help define a place for the kids to watch the balloon/magic act.
And before everyone left, they got to make their own magic wand. To keep it gender neutral, boys made Dino wands. Each child left with a set of wings, the wand that they made, a balloon creation from the balloon artist/magician and a star lollipop (from the centerpiece).
After seeing the space in person we scrapped a few ideas (that would've looked dwarfed in the space) and nixed setting up a photo booth type area due to the fact that with 51 'yes' RSVPs our space was filling up quickly, but all in all, the party was a great success. The look on Sarah's face was priceless (and really that's all that matters right?)
OK one last time:
Before:
After:
Before:
After:
And if you want to see more of my inspiration for this party, check out my
Pinterest board - '
Sarah's Party Inspiration'. If you care to follow along and want to be a part of the
Pinterest craze, leave me your e-mail address and I'll send you an invite!