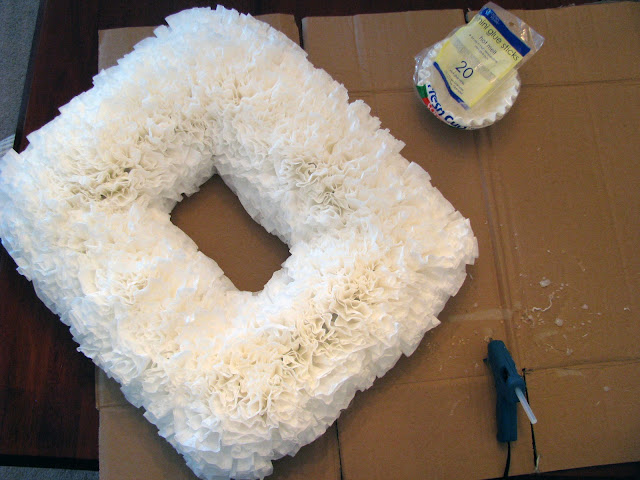
Look what I made today!
We had a snow day (well, I took a snow day because I couldn’t actually get to work, but then got word that my office closed at 1pm anyway). So…. I decided to take some time for me and make this wreath that I have been coveting all over blogland. I bought all the supplies a few weeks ago, but I’ve read over and over that it takes a while to complete so I have kept putting it off. Since we couldn’t go anywhere, I knew this was the perfect opportunity to do it. (and yes, it takes a while—probably 4 hours total).
Do you know what it's made of? COFFEE FILTERS!!! How cool is that?!
I’ve seen round coffee filter wreaths all over, but I was most inspired by this square one on The Pleasures of Homemaking.
Here’s what I used:
A wreath form (I couldn’t find a foam wreath form at the dollar store, so I cut a
rectangle from a piece of foam core instead) $1.00
White ribbon $1.00
Round coffee filters—I ended up using approx. 250 $2.00 for 2 pkg . of 160
Hot Glue (on hand)
Ribbon to hang $1.00
Diet Coke—this is essential!
It’s easy—takes a lot of time, but it’s easy—and cheap—total project cost $5.00!
Since the dollar store only had black foam core (really? Who needs BLACK foam core), I also bought white ribbon to wrap around it just in case it showed through the coffee filters. I didn’t buy enough however so I ended up having to cut and paste the ribbon over the front side. In hind-sight, this step was completely unnecessary.
I started by putting one layer on the back side of the wreath—and tried to keep it as flat as possible. This just helps to “mask” the sides of the wreath form when it’s finished.
 |
| note-- this is the back side. |
To attach the coffee filters—fold them in half to make them flat, then in half again to make a triangle, then give the end a little twist.
Once the back is finished, I put a “flat” layer on the front edges as well. I lined up my front filters with the spaces between the back filters. I don’t this really matters though—at least not yet.
Here it is half completed!
When I had the whole wreath filled in, I just hot-glued some ribbon onto the back to act as it’s hanger and …..
Wa-la!
I {heart} it big time!!! (can you tell? Did I take enough pictures of it?)
It’s a little larger than I thought it would be, so I had to re-think its placement in our house. I was going to hang in on the wall right as you enter the apartment, but it’s WAAAAYYYY to big now. I liked the size of the wreath, and knew it would be “fluffy”, but it ended up much wider that I expected too.
So…. we’re hanging it in our bedroom now. Since moving here, we have done NOTHING with the bedroom so this is a step in the right direction. Right now it’s on a blank wall, but we’re planning on making a black and white photo wall around it so… I think it will be beautiful when all is said and done. Stay tuned!
Oh, and it can easily be “customizable” for holidays by tucking little objects in it’s folds.
Aaaannnndddd…. the office already closed for tomorrow too! Woot!


5 comments:
Laura - Yay!!! I LOVE your blog!! Love this post! Your square wreath is so cute! Looks great!
Cindi said...
Love your new blog. Love your wreath. My only question is what happens when it gets dusty? Can you just shake it out? Very cool...Look out Christmas! Forget that. Look out Martha Stewart! You should have your own show
My plan is to take a hair dryer on a cool setting and blow any dust away-- like people do with artificial flower arrangements. When I get there, I'll let you know how it works!
Made this wreath this weekend!!
http://jeansnbarefoot.blogspot.com/2011/12/im-dreaming-of-diy-black-silver-white.html
I love this! I am gonna make one soon! If you like to read, please visit http://booktalkswithcharla.blogspot.com
GFC-booktalkwithcharla
Post a Comment