Showing posts with label kids. Show all posts

Friday, June 22, 2012

Ninja Party: Dessert Table (Party Part II)

To see the sneak peek of the party invitation, click here.
For Part I of the party (table decor), click here.
 
Every good party deserves a good dessert table right?   

 I LOVE a good dessert and/or snacks table at a party.  It really showcases the food, gives you more choices (for those that don't want cake) and in our case also give your guests a little something more to take home with them!
Since there aren't many "ninja specific" foods, I went with more of a red, black and white color scheme with the desserts.

Hand dipped fortune cookies, oreos, hershey kisses (with cute little party coordinated stickers on them)...
   
I displayed black and red Twizzlers in glass vases adorned with ribbon and paper pinwheels (meant to mimic Chinese throwing stars)...
   
Yogurt Covered Raisins, Strawberries (healthy option) and Swedish Fish - not pictured (mmm... Swedish Fish...).
 
My favorite dessert project however (and the favorite of the party guests) was the faux sushi:
Made with Rice Crispie treats, assorted gummy candies, fruit roll-ups and Fruit-By-The-Foot.  They turned out pretty cute (if I do say so myself).
Cole requested chocolate cake but I know not everyone likes chocolate cake, so I did white cake ninja cupcakes as well. (free printables from here)
I've learned from past experience that I can NOT frost a cake to save my life (and my sister-in-law who makes the most amazing cakes lives 4 hours away now) so I just ordered a cake from the local grocery store-- knowing I wanted a cake that was as plain as possible (and as inexpensive as possible). 
I ordered the cake-- just plain white-- no borders, no writing.  I got some weird looks both when I ordered it and when I picked it up and said "perfect!"-- but it really was just what I wanted.

Then since the whole reason we were doing a ninja party was because of my son's obsession with LEGO Ninjago (and the black ninja -- ninja Cole- which was essentially named after my son) I took four of his Ninjago mini-figures (washed them with soap and water) and placed them on top of the cake-- no need for fancy (or expensive) custom cake toppers when I already had the perfect solution right in our... toy box. (sounds weird I know, but it worked!)
We had so much dessert/snacky type food that I also bought some clear treat bags (20 for $1 at Walmart) and asked guests to fill a goodie bag before they left (in addition to the kids goodie boxes that they would get at the end of the party.)  I'm happy to report MOST of the candy/desserts went home with other people!


All in all, I was pretty happy with how it turned out and it was a big hit with kids and parents alike!
Oh and the reason that we had to have both a cake and cupcakes (besides the flavors) was this:
Cole got to cut his cake with a REAL Samuari Sword.   He was SO excited!   

And see the back of his shirt.  His birthday party shirt was my first project with my Silhouette Cameo.  I have never been so excited about a t-shirt before, but I LOVED it. (that's the Japanese symbol for the number five- for Cole's 5th birthday)

And a little "behind the scenes" look at the dessert table and the fabric backdrop I created for the dessert table.
So, do you do a dessert table at your parties?

Saturday, June 16, 2012

Ninja Party: Table Decor (Party Part I)

To see the sneak peek of the party invitation, click here.
For part II of the party (dessert table), click here.

I TRIED to convince Cole to want to have a superhero party or a rockstar party or even a pirate party, but what did he want? ... ninjas.   Ninjas!?  Let me tell you there's not a whole lot of ninja party inspiration out there.  Yes-- I found a few (check out my Ninja Party pinterest board) and yes I used some of their ideas, but there is just not a lot.  Especially when you're talking about ninjas for 5 year olds.

One thing I was sure of, I didn't want to go too heavily on the weapons.  I'd seen the tin foil throwing stars, the ninja sword fighting games and the chocolate swiss roll nunchucks, but I just didn't want to overplay the weapon thing.    I also didn't want to go TOO heavily with an asian theme and it's almost impossible to find kid-friendly dragons that are of the right level of appropriateness (not too child like, not too "adult").  

In the end, here's what I came up with.
Mostly just red white and black, but I added a couple of colorful dragon centerpieces.  

Using scrapbook paper that I got when it was on sale 6 for $1 at Michael's I brought the party theme together...

water bottle wraps, juice box wraps, pinwheels on the food table (to mimic throwing stars but in a "happier" way), and a Happy Birthday banner (seen way in the back of the photo below-- forgot to get a good photo of it on its own).
The blue, white and black color scheme of the karate studio itself wasn't EXACTLY what I would've liked but when you're working on a budget (and in a space that is not your own), you work with what you've got.  To cover some of the wall space I hung some red and white striped fabric (bought in the remant section at Walmart).  

 
The centerpieces were a total happy accident.  I was browsing the clearance section at Michael's and found these Ni Hao Ki-Lan paper dragon puppet kits.  They were on clearance for 1.99 so I bought 2. I bought the black rocks at the Dollar Store (2 bags at $1 ea.) and the white ceramic planters also from Michael's clearance (and purchased with a 20% off coupon) were $4.79 each.

At first I wasn't totally sold on the colors (as they weren't red, white and black) but in the end I think they ended up being a really good fit-- helping to make the party really kid friendly and adding a "touch of whimsy".  I didn't want to be too serious.
While trolling Pinterest a friend of mine noticed that I pinned directions for folding origami cranes and she offered to do them for me!  I gave her some pre-cut-to-the-right-size scrapbook paper and in a few days she handed me back 25 beautifully folded origami cranes.  Thanks Nicole!  (FYI-- scrapbook paper is slightly too thick for origami-- go with origami paper instead.  sorry Nicole) :)
The table runner idea also came from pinterest.  Can you guess what it is? Wrapping paper.  I got it in the Dollar spot at Target a long time ago simply because I thought it was fun.  Turns out its also the prefect width for a table runner! Score.

I also made some more DIY baker's twine in both red and black and wrapped individual serving size Pringles, used some black and white striped ribbon as napkin rings and purchased the paper straws on Amazon (best price I've found) to pull it all together.  I liked the "look" of the single serving size pringles containers but more importantly no hands in a giant chip bowl-- Hooray!!
And every birthday boy needs his own designated birthday chair right?
I cut a number 5 out of cardboard and wrapped it with yarn.  I think it's one of my favorite projects from the whole party.  I don't know why but I love it!  

In general, I'm really happy with how the table turned out!

Stay tuned because in another month or so (just kidding-- I hope!) I'll show you the food table and other miscellaneous details.

Saturday, May 5, 2012

Psst...

I'm gonna just pretend that it hasn't been almost 2 months since my last post. :(


It's almost that time again.  I'm in the midst of party planning madness.  Next Saturday we are doing Cole's 5th birthday party!  I can't believe my little man is almost 5!!

Here's a sneak peek:

Cole's ninja obsession continues (thank you LEGO Ninjago) so the challenge is to make trained assassins appropriate for 5 year olds.   I can't wait to tell you about some of the awesome deals I've scored!

For Part I of the party (party table decor), click here.
For Part II (dessert table), click here.

Saturday, March 17, 2012

St. Patrick's Day Part II

Two posts in one day?! And on a Saturday?! What the...???

The funniest part about this is that we don't usually do much to celebrate St. Patrick's Day (being that we are not Irish) except maybe wear green.  Today, we did all kinds of celebratory things, but none of us actually wore green!  Ha ha!

First thing you should know for this post -- we were not wearing green because we were instead wearing ORANGE to cheer on our Syracuse Orange Men's basketball team in the NCAA Tournament.  Go 'Cuse!  (we won-- on to the 'Sweet 16'! Hooray!!)

Secondly-- green food coloring makes EVERYTHING look completely un-appealing. That and the fact that food photography is hard and I don't have any REAL photography skills so all the pictures of food below look gross, but I promise you everything tasted just fine. :)


So, as you saw earlier today, we had an overnight visit from a leprechaun.  I love finding new traditions-- I can't wait to do this EVERY St. Patrick's Day!
Does anyone else throw all "rules" out the window on holidays and special occasions?  Cole ate 2 chocolate coins before BREAKFAST-- awesome mom or bad mom?  I guess it probably depends on who you ask.  :)
Then we had breakfast.  Green shamrock shaped pancakes and sausage for Cole and I.  And Tom had what I'm calling 'eggs-a-la-pinterest'.  (seriously if you're not on pinterest yet, what are you waiting for?  It's so awesome! Need an invite, leave me your e-mail address and I'll invite you!)

source

I had the table set in green and white.  
plastic table cloth:  Big Lots $1 (ps-- I LOVE it!  Its cheap, but it was pretty)
12" white paper doily:  Dollar Tree $1 for 18
green paper plates:  iparty  $3.79 for 24 -- makes clean up easy :)
and just our regular white paper napkins for everyday use.

I also put out my new milk glass footed bowl that I got at Goodwill for $1.  I LOVE it!  
I put some green apples in it (unfortunately the apples had seen better days at this point) and a couple of oranges since our day was going to be about both green AND orange!  

We played outside for a while because it was a gorgeous day!  And we got a package from my parents.
which promptly turned into this...
note: the addresses have been blurred for privacy reasons
 For dinner we had meatloaf with green mashed potatoes and green beans:
(warning-- I probably shouldn't even have put this picture up because it looks so unappetizing, but it really was delicious)


And for dessert (the best part of today in my opinion)-- Shamrock Shakes (using a recipe I had saved on pinterest!)
FYI-- we just used mint chocolate chip ice cream and milk and it was sooo good!

And to top it all off, there was a fireworks display in our neighborhood that we watched from Cole's bedroom window-- he was VERY excited about it.

All in all, a pretty good holiday (that we don't usually celebrate)! 

Hope you all had a great St. Patty's Day too!

Happy St. Patrick's Day!

I'm just going to pretend that it hasn't been more than a MONTH since my last post and just carry on as if I've been blogging right along.  If I just pretend I haven't been ignoring my blog then maybe its not true.  Right? :)

Aaaannnyyyy waaayyy....


Look who came to our house last night!
This little guy snuck in last night and left Cole a pot o' gold!!

He left 5 clues around the house that led Cole to his surprise.
Thanks to a last minute decision to use these awesome FREE printables from One Charming Party and a late night hunt for supplies, we had a lot of fun this morning.  Cole was SO excited about the whole thing.  Thanks One Charming Party for ANOTHER great idea!

 Hopefully I'll be back later today with MORE St. Patrick's Day fun!

ps-- those stinkin' Gold coins were hard to track down at this time of year!

source list:
Chocolate Gold Coins:  iparty   If you're thinking of doing this next year, I would consider buying them  
                                                   around Christmas when they seem to be in abundance (and cheaper)
                                                   -- $4.83
Ice Cream Cups:  I couldn't find these anywhere so I bought a small white tin at Michael's (with a 40%        
                            off coupon of course!) -- $1.20
Paper Easter Grass:  Five Below -- $1.00
Free Printable:     from One Charming Party-- FREE
LEGO minifigure:  LEGO  these are "luck of the draw" surprise packets so you don't know which one
                               you've gotten until you open the package but it can CERTAINLY be done without
                               the minifigure guy $2.00

Tuesday, February 14, 2012

Happy Valentine's Day!


Cole's school Valentine's cards.  Idea and FREE printables from here

 Teacher gifts.  Idea/Inspiration from here.
Hope everyone had a great Valentine's Day!

Monday, January 30, 2012

Finally. A Girly Party!

I've said it before and I'll say it again.  I LOVE to plan parties!  I've coordinated lots of corporate events, parties for my son-- I even helped offer ideas/vendors for a friend's son's "Rockstar" 1st birthday party, but I've never had a chance to do a real girly party-- until now!  
When my friend Kim started talking about her daughter's upcoming 4th birthday party, I subtly invited myself to help and she totally bit!  :)  Of course I was challenged to keep the budget to a minimum so we DIYed much of the decor and food, BUT we didn't want to sacrifice the details either!  Using what we already had, working with coupons and shopping post-holiday sales helped us keep the costs down.

Sarah (the birthday girl) very specifically asked for a "purple fairy pixie dust" party.  Sarah would've been happy with a store-bought tinkerbell party, but Kim (Sarah's mom) didn't want a full-on licensed character party.  
When I joined in the party conversation a few things were already set-- the venue and the entertainment. Basically we had to come up with decor, food and favors.

Kim got a great sized space to use for the party for FREE!  It presented some challenges but the price was right.  It was ALL dark wood paneling,  there was LOTS of furniture in the room (with no other space in the building to move it to), and we were given lots of restrictions- like not taping anything to the walls.

On the other hand, the space was the perfect size, it had an attached kitchenette (for final food preparations/storage), and it was FREE!   :)  All the tables and chairs were also thrown in for free.  So far our budget was off to a great start!

One week before the party I got my first look at the space.  Luckily a lot of the ideas we already had planned were going to work.  Here's the space as I saw it 1 week before party time:
from the entrance to the room

looking to the left 
non-working fireplace-- looking back toward the entry way hallway
looking right
That's a lot of dark wood and a lot of orange and blue furniture-- doesn't quite scream "purple fairy pixie dust" now does it??!

After and hour and a half of set up, here's how the room looked at party time:


A simple sparkly bow welcomed guests (bought during post-holiday-sale).

It snowed the morning of the party.  The sled not only helped move food/supplies into the space, but pulled double-duty as a great activity on the adjacent hill to keep the little ones busy during post-party clean up!
Each place setting had a large paper doily, lime green plate, Tinkerbell fairy napkins and cups (Sarah's choice) and an extra napkin sticking out of the cup to add a little height to the table setting.


The tables were scattered with sparkly fairy confetti and white flower petals found on clearance in the  wedding section.

I also found mercury glass votive candle holders in purple with rhinestones and silver with butterfly appliques for $.30 each in the holiday clearance bins at Michael's craft store.  We used battery operated tea light candles (3 for $1.00 at DollarTree) to add some warmth without adding any risk.  Even though it was a daytime party, it felt really special to have the flicker of "candle"light.
apparently the fairy with the black hair really liked them :)

Centerpieces included tissue paper flowers and star shaped lollipops for the kids to take at the end of the party in simple mason jars.  Totally simple and totally kid friendly!

Each child's chair had fairy wings (found in the Target dollar spot) for the kids to wear and then take home-- serving as both decor AND favors.  Gotta love double duty items!


Even though this was a children's party, we still wanted things to LOOK nice, so we dressed up the food table with glass serving pieces, fun ribbon (also seen here) and lots of sparkle.


One of my favorite projects that we did were the tutu cake stands.  I'll be back with a quick tutorial on how we did these.  Really easy and SUPER cute!
We took store bought subs, cut them into bite sized "fairy bites" and cut peanut butter and jelly sandwiches into star shapes.
To dress up some Pirate's Booty, we portioned out single servings into cute cupcake liners (bought at Michael's with 40% off coupon) and served them on a silver tray.

Of course every good kids party has to have theme appropriate named food/drink.  We served:
"Fairy Bites" sandwiches
"Twirly Wands" pasta salad
"Pixie Puffs"  Pirate's Booty
"Magic Munchies" carrots and celery (with hummus and ranch dip)
"Tinker-berries" grapes
"Pixie Punch" pink lemonade
"Tinkerbell Tea" iced tea
"Dew Drops" water
And for dessert we brought out cake (which I totally forgot to take a photo of), wafer cookie bites and of course even the Hershey kisses got gussied up for the party!
Inspiration from here.  We didn't do the gumball topper (which is much cuter) because of the choking hazard.


Above the food table hung paper stars (like the ones I used here) and these sparkly damask ornaments that I also found in the Michael's post-holiday clearance section for $.30 ea.  It was hard to get a photo of (because of the windows), but you'll have to take my word for it that it was REALLY pretty!


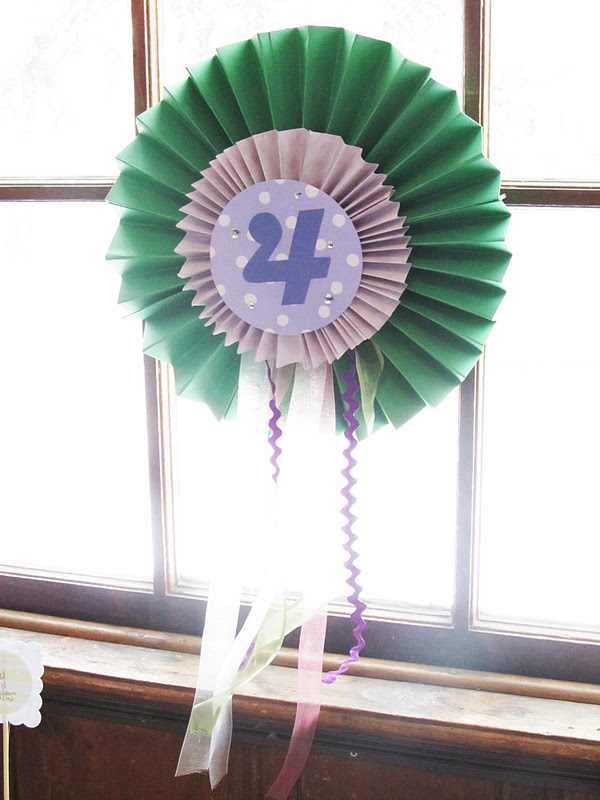
Behind the food table, the medallion that I previewed here hung via suction cup hook from a window-- also REALLY hard to get a good photo of.

The fireplace area was dressed with lots of tissue paper pom poms.  Originally we were going to hang them  over the fireplace, but when I saw that giant black rectangle where a mantle must've been, I knew we had to cover it with SOMETHING.  I wish I'd done 3 or 4 more, but over all it was not a bad guesstimate either.

The handmade Happy Birthday banner also hung above the fireplace.

We tucked these glittery fairy ornaments (bought on post-holiday-clearance at Walmart for $1.48/12) all over the party. 


And used small frames that I bought during a post-Halloween-sale ($.50 ea.) last year to hold cute fairy quotes and inspirational words.

Balloons with Hershey kiss balloon weights were also strewn throughout.

Kim brought a lavender area rug from her daughter's bedroom and we moved a couch out into the space on a diagonal to help define a place for the kids to watch the balloon/magic act.

And before everyone left, they got to make their own magic wand.  To keep it gender neutral, boys made Dino wands.   Each child left with a set of wings, the wand that they made, a balloon creation from the balloon artist/magician and a star lollipop (from the centerpiece).
After seeing the space in person we scrapped a few ideas (that would've looked dwarfed in the space) and nixed setting up a photo booth type area due to the fact that with 51 'yes' RSVPs our space was filling up quickly, but all in all, the party was a great success.  The look on Sarah's face was priceless (and really that's all that matters right?)

OK one last time:

Before:
After:
Before:
After:
And if you want to see more of my inspiration for this party, check out my Pinterest board - 'Sarah's Party Inspiration'.  If you care to follow along and want to be a part of the Pinterest craze, leave me your e-mail address and I'll send you an invite!