Showing posts with label easy. Show all posts

Saturday, March 17, 2012

St. Patrick's Day Part II

Two posts in one day?! And on a Saturday?! What the...???

The funniest part about this is that we don't usually do much to celebrate St. Patrick's Day (being that we are not Irish) except maybe wear green.  Today, we did all kinds of celebratory things, but none of us actually wore green!  Ha ha!

First thing you should know for this post -- we were not wearing green because we were instead wearing ORANGE to cheer on our Syracuse Orange Men's basketball team in the NCAA Tournament.  Go 'Cuse!  (we won-- on to the 'Sweet 16'! Hooray!!)

Secondly-- green food coloring makes EVERYTHING look completely un-appealing. That and the fact that food photography is hard and I don't have any REAL photography skills so all the pictures of food below look gross, but I promise you everything tasted just fine. :)


So, as you saw earlier today, we had an overnight visit from a leprechaun.  I love finding new traditions-- I can't wait to do this EVERY St. Patrick's Day!
Does anyone else throw all "rules" out the window on holidays and special occasions?  Cole ate 2 chocolate coins before BREAKFAST-- awesome mom or bad mom?  I guess it probably depends on who you ask.  :)
Then we had breakfast.  Green shamrock shaped pancakes and sausage for Cole and I.  And Tom had what I'm calling 'eggs-a-la-pinterest'.  (seriously if you're not on pinterest yet, what are you waiting for?  It's so awesome! Need an invite, leave me your e-mail address and I'll invite you!)

source

I had the table set in green and white.  
plastic table cloth:  Big Lots $1 (ps-- I LOVE it!  Its cheap, but it was pretty)
12" white paper doily:  Dollar Tree $1 for 18
green paper plates:  iparty  $3.79 for 24 -- makes clean up easy :)
and just our regular white paper napkins for everyday use.

I also put out my new milk glass footed bowl that I got at Goodwill for $1.  I LOVE it!  
I put some green apples in it (unfortunately the apples had seen better days at this point) and a couple of oranges since our day was going to be about both green AND orange!  

We played outside for a while because it was a gorgeous day!  And we got a package from my parents.
which promptly turned into this...
note: the addresses have been blurred for privacy reasons
 For dinner we had meatloaf with green mashed potatoes and green beans:
(warning-- I probably shouldn't even have put this picture up because it looks so unappetizing, but it really was delicious)


And for dessert (the best part of today in my opinion)-- Shamrock Shakes (using a recipe I had saved on pinterest!)
FYI-- we just used mint chocolate chip ice cream and milk and it was sooo good!

And to top it all off, there was a fireworks display in our neighborhood that we watched from Cole's bedroom window-- he was VERY excited about it.

All in all, a pretty good holiday (that we don't usually celebrate)! 

Hope you all had a great St. Patty's Day too!

Tuesday, October 18, 2011

It really IS that easy!

OK when I saw this this a.m. I thought... 'No WAY it's that easy! This must be some sort of blog conspiracy to make me think I can quickly and easily make homemade donuts.  But... I've got to try it to find out!'   Homemade donuts.

So imagine my joy when my 4 year old son said he wanted to do breakfast for dinner tonight!  (seriously-- I swear I hadn't told anyone about the homemade donuts-- he totally came up with this idea on his own)  So... I tried it-- and it IS that easy (and it took like 20 seconds to do).

Homemade donuts:  two ingredients-- refrigerated buttermilk biscuits and oil to fry them in.

I always just assumed making donuts was hard.  It's not.  Check out the real recipe here or here.

And I assumed making donuts this way wouldn't actually taste like donuts.  But they do!  And they are good.  Really good. (ps-- I rolled my donuts and donut holes in cinnamon sugar)
Now... who wants to come over for breakfast?

Sunday, October 2, 2011

Office Makeover Breakdown: Flower Vase

Wanna know what my flower vase looked like before I put it in my cubicle?

actually it only looked like ONE of these (but I happened to buy and photograph 2)
I found these plastic vases at Big Lots during an end of summer clearance event.  They were $.50 each so I bought 2 because I loved their shape.

this angle-- looking down INTO the pot, gives me even MORE ideas


A little white glossy spray paint,  a couple of stems of Dollar Tree "flowers" and Voila!


Project costs breakdown:

Vase:  $.50
Spray Paint:  $4.47 (Krylon Fusion -- for plastics)
Flowers:  (3) stems at $1 each = $3.00

Total cost:  $7.97

The most expensive update to my desk, but I love the impact that it has!


Saturday, October 1, 2011

Office Makeover Breakdown: Desk Calendar

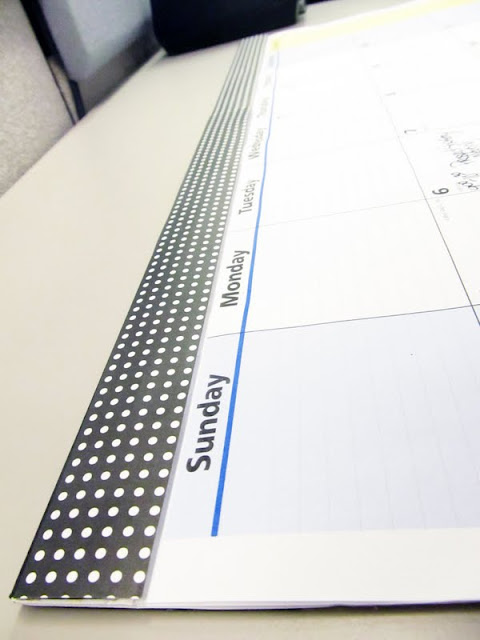
OK-- here's a super quick and super easy (and FREE) update than anyone can make.  It doesn't make a BIG impact, but it makes me happy nonetheless so... 

Here's the before:  my plain ole' run-of-the-mill office desk calendar


And here it is after a little scrapbook paper and a glue stick-- that's all it took!

Before:
After:
Before:
After:

Before:

After:
I guess you could say it doesn't take much to make me happy!

Friday, September 30, 2011

Office Makeover Breakdown: Standing File Holder

OK-- so here's my second favorite project from my office makeover-- the standing file.  (second only to the pennant banner project which makes me so happy!)

I knew I wanted a standing file organizer for my desk space (to help corral some of that "I need it at my fingertips every day" type clutter that an office desk has, but I also knew I wanted it to be pretty and not cost me an arm and a leg.  Enter Martha Stewart Tutorial.


So if you haven't already checked out that tutorial-- you'll never guess what this organizer is made from.

A cereal box!  That Martha-- she's a genius I tell ya'.

So go raid the pantry and make one of these!  Now!

Gather your supplies:
note:  I ended up using different paper but didn't take a new "supplies" photo
Figure out where you want to make your cut and mark with a straight edge.
yes, this cheapskate buys "store brand" cheerios.  Not all "store brand" cheerios are good, but these from Aldi (if you have one near you) are actually pretty close to the real thing!

You could probably Mod Podge or decoupage or contact paper your box, but I just used plain ole' scrapbook paper and my trusty glue stick.  I laid the box out on my papers and marked.  Then when I cut them out I left a LITTLE overhang so that they could wrap around the edges to ensure no "gaps".  A piece for each side, front, back and bottom completed the outside.  FYI:  with my cereal box the 12"X12" paper worked REALLY well!


Then, using a complementary paper, I started on the inside.  Since I was using a patterned paper, I was able to work with any creases easily when using more than one piece to fit a side (with the 8 1/2" X 11" paper that I used for the inside).
Because I knew no one would see the inside bottom of my file, I chose to leave that part alone, but it would have been easy enough to do the whole thing.
Here's the beauty of this project (and the specific papers I chose).  If you have little bits that don't get totally covered, you can easily disguise them with a little marker action.  

Now you see it:
see the bit of yellow peaking out.  Oh and look at that-- some of my camera strap made it into the photo too-- oops!
Now you don't:
Hooray for quick fixes!

And now a few glamour shots:

I LOVE this cool retro bin I found in our office supply closet at work too.

Total cost for this project:  FREE-- I already had the cereal box, papers, marker and glue all on hand!

Now I just can't wait to get a house so I can make some for a home office too! :)