Holy Moly-- it's been a whole week since my last post! Sorry! I was on my own last week (as the hubs was on the opposite coast visiting his twin brother) and apparently I had a few other things to do. Poor little blog-- so neglected. So... alone.
Well, guess what baby? I'm back! And I think I've got something good for ya' too.
DIY Baker's Twine. Yup- you heard me. DIY Baker's Twine. Are you dying? I was when I came across the tutorial (which has forever vanished into oblivion-- I can't find it anywhere!)
Baker's Twine: so many incredible uses:
Card making--
 |
| image source: Poppy Paperie |
Homemade gifts--
 |
| can't find image source (not mine) - ugh!- gotta keep better records |
 |
| image source: The Twinery |
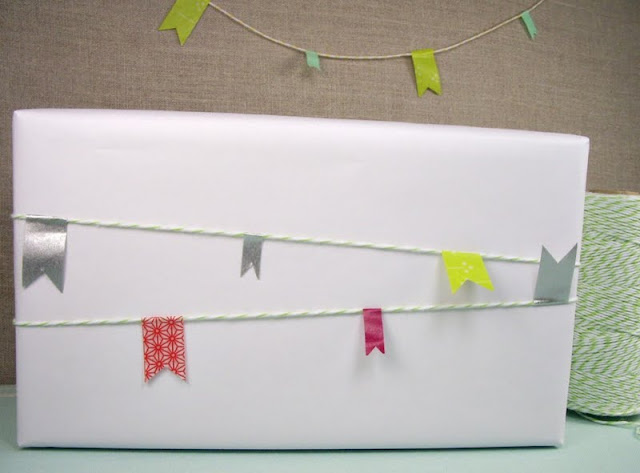
Gift Packaging--
 |
| image source: The Twinery |
 |
| image source: Whisker Graphics |
 |
| image source: 'The Twinery' |
Sure you could use plain string, but it's all about the little details. Mine isn't quite as luxurious as The Twinery twine, but mine also only cost me $.50 so... for now, this will do.
Here's how I've used mine so far. As seen here:
and here (I used custom twine for the circle garland hanging from the ceiling):
I was waaay to excited about this when I came across this simple tutorial a few months back. Unfortunately, I didn't write down where I found the tutorial and now... it's totally wiped from my brain. Not a clue! If it was you, I apologize and let me know and I'll totally hook you up with a link from this post!
Supplies needed:
Cotton String
Ruler
Permanent Marker (in your choice of color)
Scissors
I found this huge spool of crochet cotton at Goodwill for $.50 and I knew IMMEDIATELY what I'd do with it so I scooped it up.
It was in perfect condition-- no weird discolorations, no funky smells, and lots of it left... PERFECT for this project!
 A few years back I received a huge package of multi-colored Sharpies as a part of a Christmas present (how well does my husband know me and my obsession with stationary products?). I'd been waiting for just the right project to break them out and luckily they hadn't dried out on me.
OK. Let's get started. Take your ruler and your string.
Actually, I added an extra step to mine. Because I was using a ruler that I didn't want to mess up, I wrapped my ruler in a sheet of copy paper-- just to protect it from any bleeding Sharpie marker (and I was really glad I did). If you have a ruler that you don't care about, you can certainly skip this step. I think I may hit up the back to school sales for a cheap ruler that I can dedicate to baker's twine production- thus allowing me to skip this step for the future.
Tightly wrap your string around your ruler. And by tightly I mean close together, not necessarily taught (although I guess that's kinda important too)...


Once your string it wound the full length of the ruler (or as far as you want - depending on how much twine you want to make), tape the loose ends to the ruler so the string doesn't slip around.
Then you take your permanent marker and start making lines-- I made three lines on each side of the ruler with white space in between. You'll have to work slowly and press down a bit to really get the string to absorb the marker, but you'll get the hang of it quickly.
And the beauty of it is, your lines don't have to be perfectly straight or even-- you'll never be able to tell once you unwind the string.
Once both sides are done, simply unwind and admire your pretty new baker's twine.

 |
| the green looks so much more vibrant in photos, but the light blue really turned out nice too- I swear. |
This project is a little time consuming, but it's the perfect project to do while sitting around watching reality TV inspirational and educational television programs.

So with enough pre-planning, you can create your own baker's twine to match your next project!
p.s.-- I just got some thicker (softer) cotton string to try it with-- I'll update you when I've completed it with that string and let you know how well it worked.


2 comments:
what a wonderful idea..I love it
This is really cool! Thanks for sharing! :)
Post a Comment