
Sunday, June 5, 2011
Sneak Peek: Memorial Day Picnic
So I know I still owe you some tutorials from Cole's 4th birthday party, but I also wanted to give you a quick sneak peek of the Memorial Day "picnic" I hosted. I'll come back to this after the birthday party details wrap up though-- probably just in time for the 4th of July. :)


Tutorial: Custom Party Blowers - three ways.
First of all I need to apologize for disappearing again for a bit-- we went "home" for the weekend and I got caught up in planning our get away and"stuff" so I neglected my little blog again. OK-- back to the party!
I'll try to make it up to you though with this post. It's one tutorial but THREE ways that you can accomplish custom party blowers for your next party. First I'll give you the tutorial for the way that I ultimately decided to make my custom party blowers.
#1.

So... I bought these guys at the Dollar store-- again, knowing I wasn't going to keep them looking like this. I chose these specifically though because the blower part was blue-- within the party color scheme.


Cheapskate tip: the earlier you come up with a theme, the more time you have to look for great deals on supplies-- each of these rolls of ribbon cost me just $.50 on clearance after the holidays.
First I took off all the card stock circles and cut the ribbon into 8" lengths.


Tie ribbon in a simple knot around the blower part and... viola!


Before and After:


OK-- let's be real now. I LOVE these. And I think they are SUPER cute, but the main reason I did them this way is that I ran out of time. These were a happy accident. A "shoot-- I want to create custom party blowers, but I ran out of time" accident. I love it when it works out! And I may use this accident technique for future parties as well!
Here's how this project started however.
#2. Originally I was going to trace the pattern of the circles that came on the blowers and cover them with scrapbook paper and enbellishments, but... the place where I got stuck was with what a pain it was going to be to cut out the holes to insert the blowers though. If I decided to do these more often, I bet there is a special hole punch that you can purchase that would make large enough holes, but, I'm sure it would be expensive AND...there was a second issue too.

I think these circles are just too big! They seem a little excessively large to me so that would've meant creating a whole new template using this one as a guide-- and I just didn't have the time for that.
So...the project morphed into this:
(note-- the following photos are from my trial run-- I didn't take it beyond this step because I wasn't overly thrilled with the end result). I think my IDEA is 'ok' it just needs some refinement. If you choose to try option #3-- please keep this in mind.
#3.

The next issue was how to get the blower though the circle. I cut slits in two opposite edges of the circle.
 |
| "template" prior to scrapbook paper version |


So the morals of this story are that sometimes it take a lot of forethought to get good deals and trial and error can sometimes lead to a great discovery of a faster, easier and cuter way to make your party special!
I love these! ..... a lot.
Saturday, May 28, 2011
Tutorial - Custom Party Hats
I always have trouble with the party hat dilemma. No one really WANTS to wear a party hat, but.... if you put them out and the 4 year old birthday boy starts handing them to people, they will put them on. But they won't want to, so.... do you do the party hat thing or not?
I did.
But I didn't want to go the store bought party hat route. I originally thought that I would try to find plain blue party hats, buy some white circle labels (ie. tag sale labels) and make polka dot hats. Well... I couldn't find plain blue hats in any of the stores that I went to and as a cheapskate I HATE paying shipping fees for purchasing things online (I wait until I can find a "Free Shipping" code most of the time).
So... I bought these at the dollar store.

A little less than appealing, but I wasn't too concerned with the design on them because I knew that I would change them. And even though it was a little more work that I originally planned. I'm pretty pleased with the end results.
Here's after step 1:

And here's the final end product (although some of the pom poms got a bit smushed by this point when I took the photos- after the party):

It was a little more work -- but really-- NONE of it was hard. I didn't take photos of the process -- but I promise you it was really easy.
I took one of the store bought hats apart-- traced the outline of the deconstructed hat on scrapbook paper-- put the store bought hat back together-- used my trusty glue stick (yes- I'm pretty much a 1st grader) and glued the paper to the hat.

As seen in this post, I used the larger 4s that I cut out at work and just glued those to the front sides. I didn't do this right away though-- hence some photos with the 4s and some without-- I took photos at two separate times.

For the pom poms, I took a piece of tissue paper-- approx. 4 inches in length -- accordion folded it lengthwise at about a 1/2 inch width a few times and then cut tiny slits in one side of it a little more than half way through the width. Then I rolled the strip into a "tube" stuck it in the top of the hat, taped it on the inside a bit and fluffed.
FYI: In hind-sight, I probably would've done the pom pom part BEFORE putting the deconstructed hats back together and before gluing the paper on, but... it worked my way too-- just would've been a little easier the other way.
pom pom without 4s:

pom poms with 4s:

I tried the hats on my huge head and the elastic wasn't staying all that well. Since it was going to be mostly adults in attendance (family) I knew I'd have to make them a little sturdier and I didn't want to go the "cute ribbon" route-- that was one way to ENSURE no adults would put on a party hat-- so a little scotch tape on the inside of the hat and the elastic stayed in place (for a little while anyway).
Again hats without 4s:


Hats with 4s:

and one final without:

Now for the whole progression again.
One more time. Before:

After:

and After After:
And how do you store cute party hats with pom poms that you made a week and a half before the party so that they they don't get smushed or crushed (remember my smushed pom pom pictures are from AFTER the party)?
not to toot my own horn, but I'm kind of a GENIOUS!


Saturday, May 21, 2011
Tutorial: Custom Napkin Rings - Fail (or was it?)
So remember how I mentioned that my first try at the custom napkin rings was a fail-- here's why.
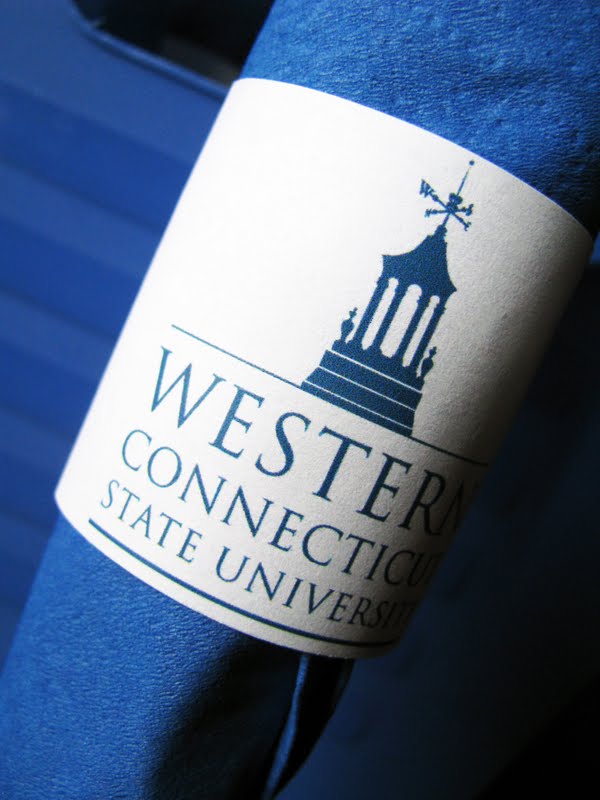
I've made custom napkin rings a million times (OK- a few times).
For Cole's 3rd birthday party (OK-- admittedly the numbers are a little bit ghetto-- it was my first attempt at custom napkin rings and I just drew them on with a stencil)


And for a graduation party for my oldest step-daughter Caily. FYI- the party never actually happened because we couldn't coordinate schedules over the summer :(


This time however, I over thought it and over did it.
At first my napkin rings started out like this.


THEN I got all "need more details" on myself and over did it by adding 4's to it.

 See what I mean? Too much!
I tried a couple of different versions too--
coordinating 4s


So... what did I do? Well, the glue was dry and the 4s were REALLY stuck so....
I just turned the napkin rings around. Makeshift? yes. Did anyone at the party care? not a bit.
 Here's my super complicated tutorial for you now.
Choose your scrapbook paper.

Cut strips 1 1/2" by 4 1/2".
 Use glue stick to add embellishments (ie. second strip of complimentary paper, 2" punched circle etc.)
Note-- embellishments can be made from anything-- while the 4s didn't necessarily work, you can see how fancy my "template" was -- a hand drawn 4 cut out of cardstock (which I did at lunchtime at work one day)

Shape paper into tube-- overlapping paper about 1/4". Glue with glue stick.

 tip: make sure you use paper that is thick enough (ie. scrapbook paper- not just copy paper) but not too thick (like cardstock). The paper I used this time was a little too thick and made the "tubes" a little difficult to roll without creases and I ended up having to scotch tape them to keep them shut. Live and learn!

See-- its practically a 2nd grade art project. Anyone can do it! And it really doesn't take that long to do either. The possibilities are endless... have fun with them!
I've made custom napkin rings a million times (OK- a few times).
For Cole's 3rd birthday party (OK-- admittedly the numbers are a little bit ghetto-- it was my first attempt at custom napkin rings and I just drew them on with a stencil)


And for a graduation party for my oldest step-daughter Caily. FYI- the party never actually happened because we couldn't coordinate schedules over the summer :(

This time however, I over thought it and over did it.
At first my napkin rings started out like this.


Cute right?

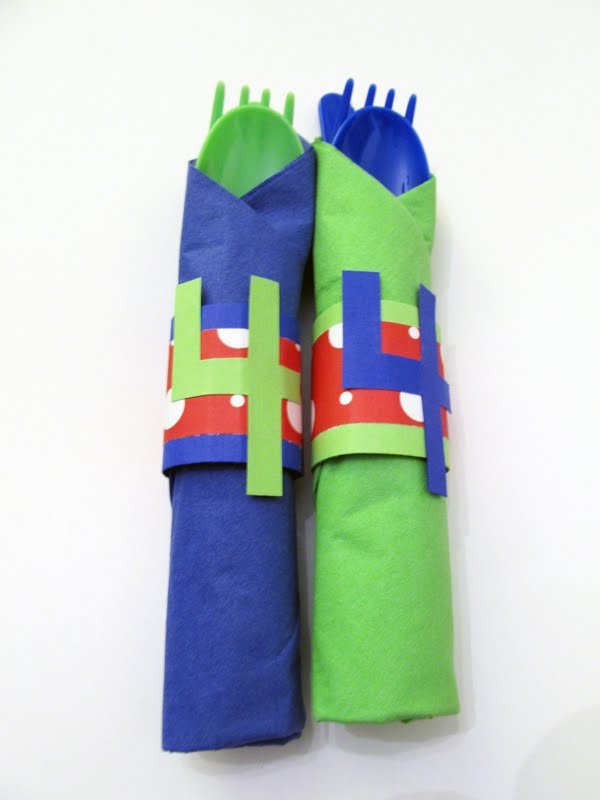
I tried a couple of different versions too--
coordinating 4s

and matching 4s

either way it just didn't work.
I just turned the napkin rings around. Makeshift? yes. Did anyone at the party care? not a bit.

Choose your scrapbook paper.

Cut strips 1 1/2" by 4 1/2".


Note-- embellishments can be made from anything-- while the 4s didn't necessarily work, you can see how fancy my "template" was -- a hand drawn 4 cut out of cardstock (which I did at lunchtime at work one day)

 |
| larger 4s were for the party hats-- more on those later |


See-- its practically a 2nd grade art project. Anyone can do it! And it really doesn't take that long to do either. The possibilities are endless... have fun with them!
Subscribe to:
Posts (Atom)