If you remember, after this post, I mentioned to hold on to any scraps that you created because we would do something fun with them! Well.... today's the day to do something fun with those scraps.
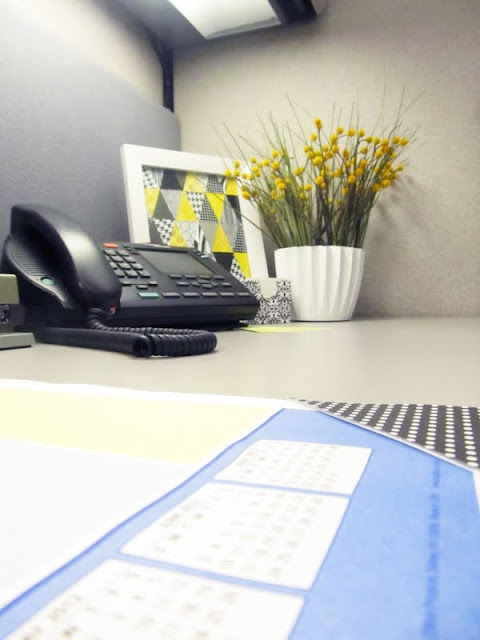
I used the ancillary triangles that are created by the "fold and cut" method presented in the pennant banner tutorial to create some coordinating art for my desk space as well.
I found the frame at the Dollar Tree and knew I could create some "cheap" art for my desk. I had planned to create a mosaic type art using paint chips, but when those little triangle pieces started falling in my lap, I changed my tune.
It is SUPER easy to do-- especially since you've already have your coordinating papers picked out.
I started by roughly laying out all the triangles in the color/pattern combinations that I liked.
Once I had that done, I realized that they didn't fit my 8X10 frame exactly so I re-worked them a bit. I started by taping row by row together so that the edges remained even and so I didn't loose track of the pattern combinations I had already come up with.
Once I had all the rows laid out I put them over a sheet of cardstock (for a little stability) cut to my 8"X10" dimensions. I actually used a patterned cardstock (since that's what I had on hand).
I arranged the rows until the top and bottom rows were evenly of the page and marked where they needed to be cut.
I took my handy paper cutter and made a straight cut across the top/bottom of those rows.
Then it was just a matter of gluing all my rows onto my cardstock template.
The edges needed some scraps also, but once all the rows were in place it was easy to see just what shapes/sizes I needed. I took remaining triangle pieces and cut them to fit. Replace the glass and secure your new artwork in the frame --Easy peasy!
And I love it-- makes my desk feel a little more "homey" than "officey"
I should mention that using the patterned cardstock proved to be a great choice because it hides some of the imperfections in the way some of the triangles line up (since my patterns are pretty "busy").
Total cost for this project: $1.00 for the frame. Paper scraps, tape and glue stick I had on hand.
The best part-- I didn't have to throw away all those cute triangles! (and yes-- I realize how nerdy that sounds.)


2 comments:
What a great example of resourcefulness, creativity, and frugality! And all those skills helped to create a more liveable office cubicle. Kudos!
You have a great space. This will definitely turn out well. Remember to use a variety of containers to organize your office supplies and work materials. It would also be prudent to keep a wide range of desktop organizers or trays to organize papers.
Post a Comment